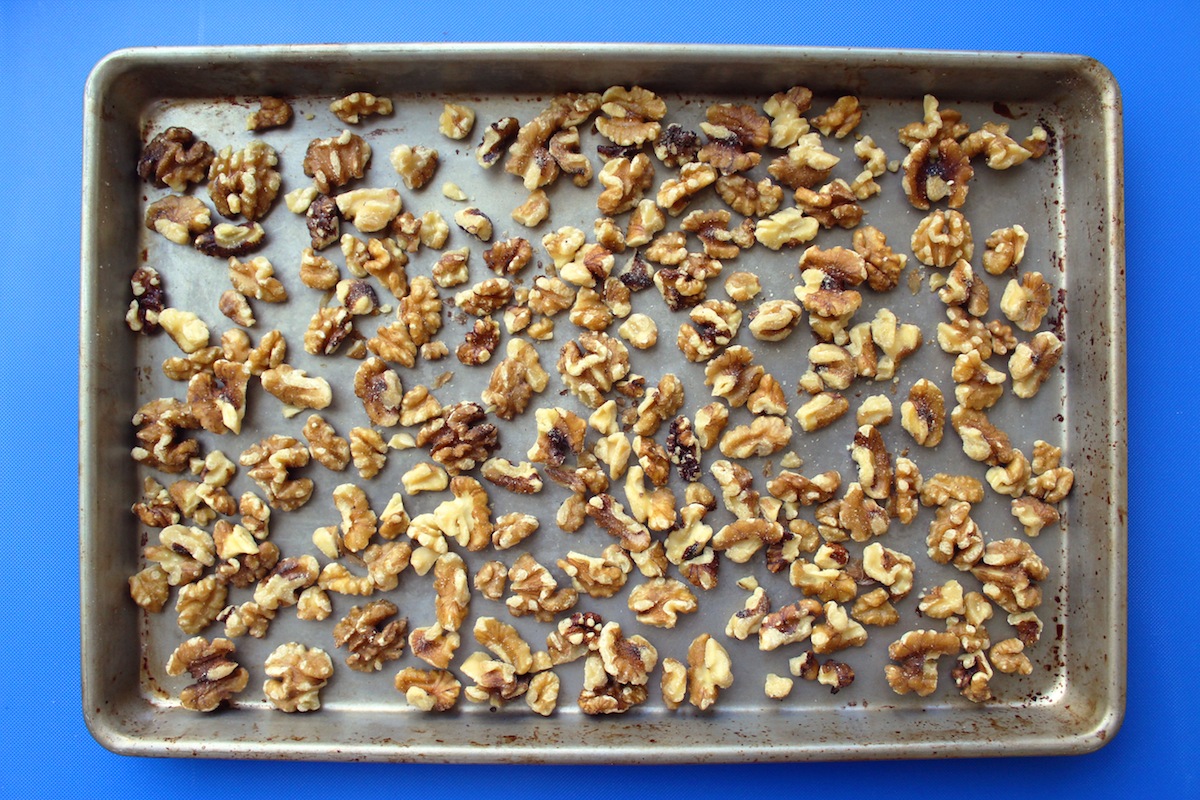
Place raw nuts (walnuts, pecans, or almonds) on an ungreased baking sheet and bake in a preheated 350 degree F oven for 8 to 10 minutes, stirring a couple of times. Cool completely before using. Toasting greatly enhances the flavor of nuts. Always toast nuts before chopping.
I got tired to throwing away half of my celery when it went bad so I found a way to keep it twice as long. Here’s how:
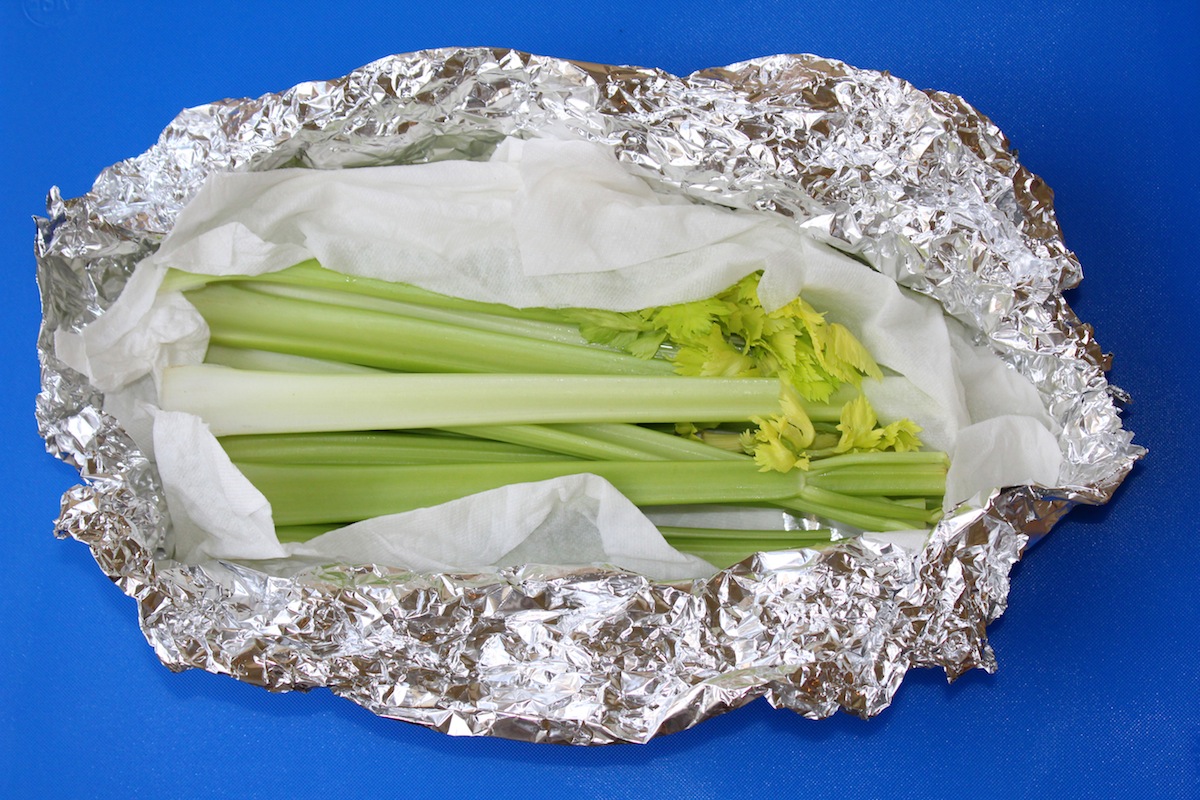
Separate and wash the celery. Pat it to remove excess water. Lay down a large sheet (about 18 by 18 inches) of heavy duty extra wide aluminum foil. Wrap the still damp celery in 2-3 paper towels and place in the center of the foil.
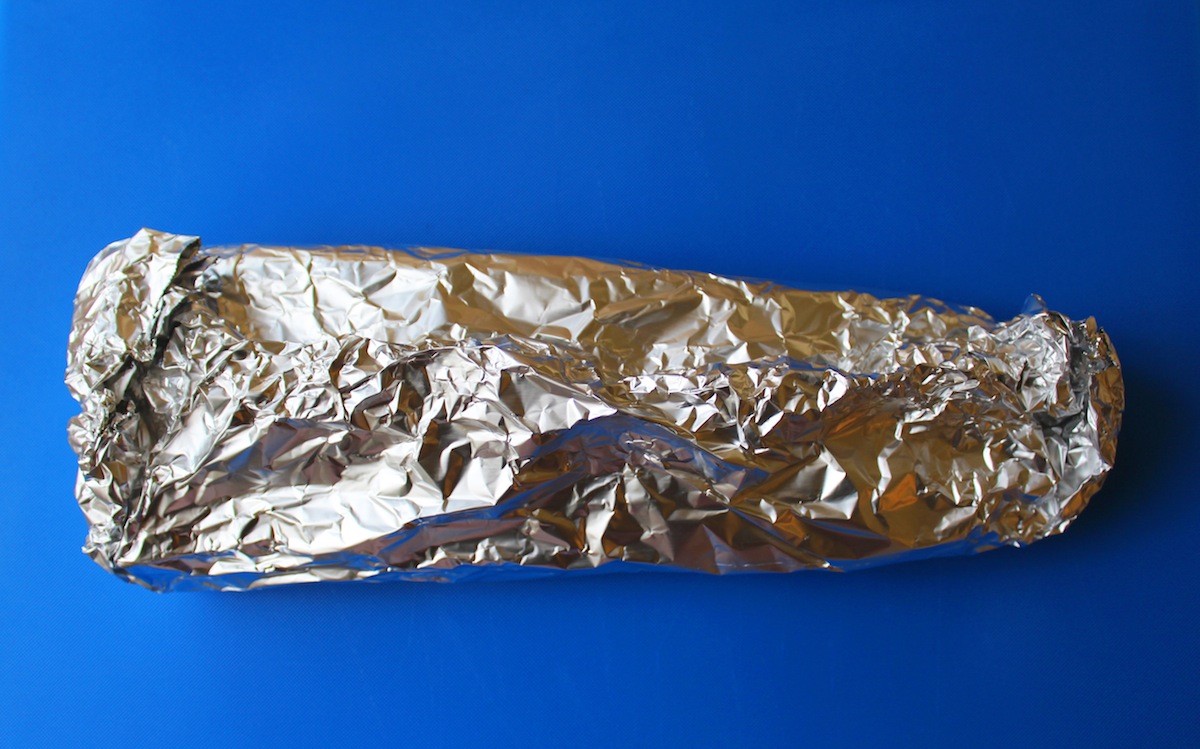
5. Wrap the celery in the paper towels and then the foil, starting with the long side and then fold in the ends.
6. It’s easy to open and re-close the celery packet when you use heavy duty foil. The paper towels continue to keep moisture away from the celery, allowing it to stay fresh much longer. The worst thing to wrap celery, or any other high-moisture vegetables in, is plastic.
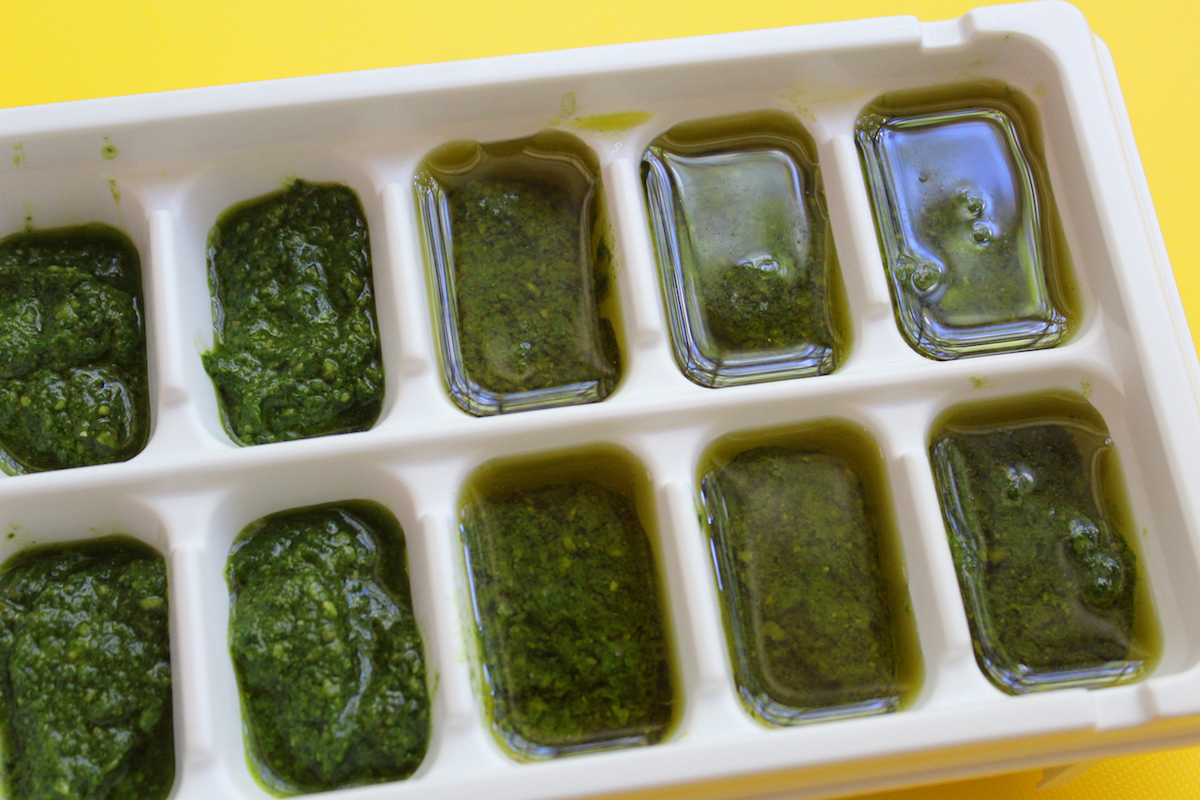
Drop some pesto in each compartment of an ice cube tray but not all the way to the top. Then cover each one with a little olive oil, just enough to cover the top completely. This will keep the pesto from turning brown. Freeze the tray and once the cubes are frozen, remove from the tray and store in zip top freezer bags. To make your own healthy homemade pesto, click here for the recipe. – Jenny Jones
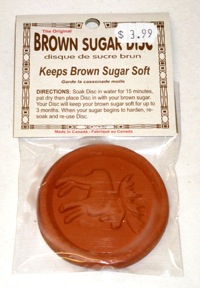
Brown sugar gets hard when its moisture escapes. The best way to keep brown sugar soft is to use a small clay disc and it works really well. Here’s an example below… It costs less than $5 and you just soak the disc in water for 15 minutes and then put it into a fresh bag of brown sugar. Seal up the bag tightly and you’re done. Mine stays soft until I finish the bag. You can even use a piece of broken clay from a pot as long as it’s unglazed.
Most doughs rise faster in a warm and humid environment. Here are some ideas on warm places to let your dough rise:
1. Oven – a) Turn on the oven for about one minute and turn it off. Place dough in the warm oven. b) Place a pot of boiling hot water in a cold oven. Place the dough inside with the hot water. These will only work until you need to preheat the oven to bake. If you have a second oven, you can keep the dough in there longer.
2. Heating Pad – Set the dough on top of a heating pad and set the pad to low or medium temperature.
3. Lamp – Turn on a reading lamp and set the dough under the bulb.
4. On Top of Fridge – Your refrigerator generates heat so it’s usually warm on top of the fridge so you can place the dough there.
5. Microwave – Bring a cup of water to boil in the microwave. After it boils, put the dough in the microwave with the cup of hot water and close the door right away. This creates heat and humidity.
6. Neck Wrap – If you have a neck wrap that you heat in the microwave, you can heat it up and wrap it around the container that holds the dough.
7. Bowl of hot water – Fill a bowl with very hot water and put a flat top on it like a plate or pizza pan. Place the dough on the plate and drape a towel over the dough and bowl to keep the heat in.
8. Window – If the sun is coming through a window in winter, place the dough next to the window in the sun.
9. Hot Car – If your car is parked in the hot sun, put the dough in the car.
Did I miss any? If anyone has other suggestions, please post them below.
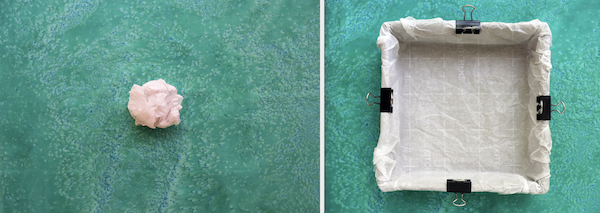
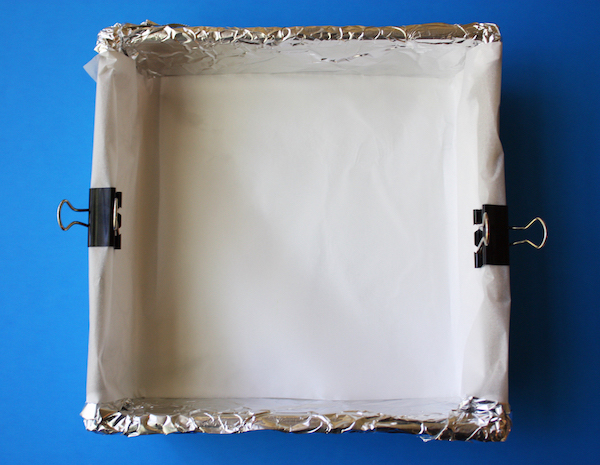
This really works! Lining a square pan is never easy but this way is so much better. A few people shared this concept of crumpling up the paper into a ball and then pressing it into the pan. I was a little skeptical but decided to try it and this is now the only way I line a square pan. My old way is below…
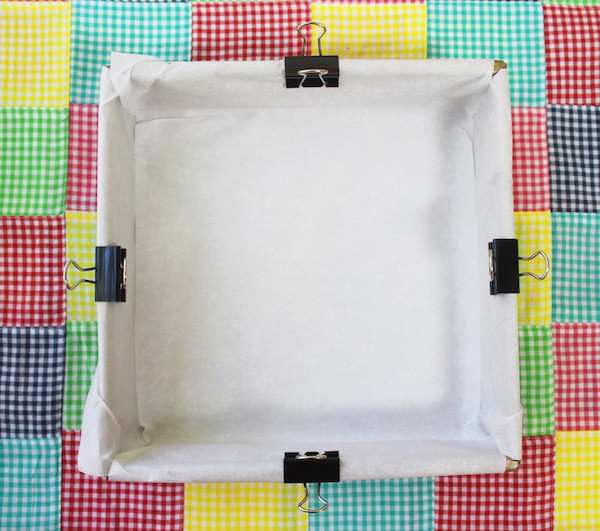
When making granola bars or bar cookies, lining the pan with parchment paper is not easy because it won’t always stay in place, but I found an easier way to do it… with binder clips. You can get them at a stationery store and since they’re metal, they can go right in the oven. Cut two parchment paper pieces a little bit wider than your 9-inch pan and lay them in, criss-crossing each other, clipping the ends down as you go. It will keep the paper in place and you won’t have to wash the pan. To save money, since parchment paper costs more than aluminum foil, here is another way:
Line the pan with foil first. Then cut a strip of parchment paper the same width as your pan, either 8 or 9 inches, and lay it on top of the foil, clipping in place. This way is easier, parchment paper releases food well, and you’ll save money! – Jenny Jones
Click the “Your Photos” link at the top and use the link provided or just click on this link: YourPhotos@JennyCanCook.com An email window will open and you can attach or drag your photo into the email and send it.
“Which flour do I use for bread, or muffins, or cookies?” “Can I substitute one flour for another?” “Why is my flour mixture so dry?” I hope this helps clarify any questions you have about flour. By the way, with all baking the amount of protein in flour matters. The lower the protein, the softer the baked goods. So here is my simple guideline to baking with flour:
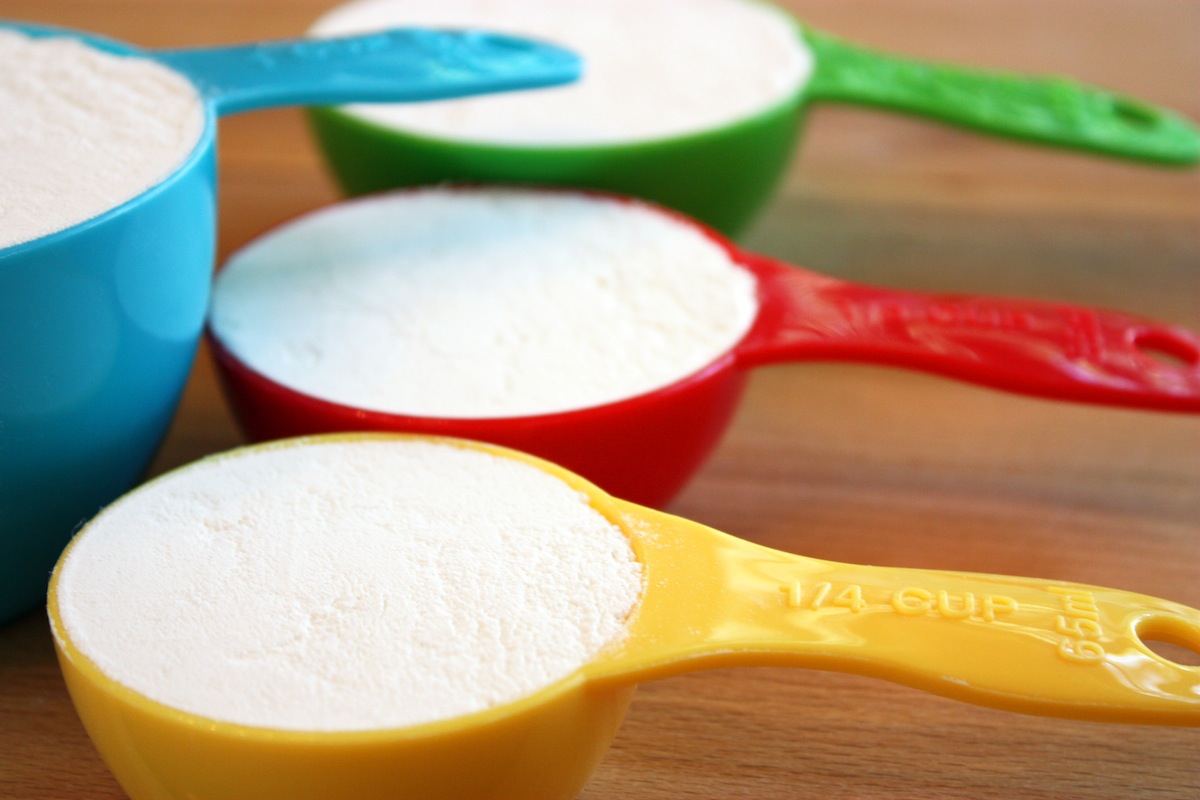
How to Measure (& Aerate) Flour Flour must be aerated before measuring because it often settles in the bag or container making it heavy and compact, resulting in too much flour being measured. Aerating basically means fluffing it up and is not the same as sifting. Flour should not be sifted before measuring unless the recipe states to do so. Sifting will result in too little flour being measured.
If you dip into flour without aerating, you will be getting too much flour and your dough will be too dry. To aerate flour you simply stir it around with a spoon before measuring. To measure, be sure to use a flat-topped dry measuring cup like in my photo. To see a short video on how to aerate flour click here.
After aerating, there are two ways to measure the flour: 1) Scoop & Level – Gently scoop the flour up with a spoon and sprinkle it into your measuring cup until it’s mounded above the rim. Do not tap the cup or the container of flour. Finally, level off the excess flour with the back of a knife. 2) Dip & Level – Gently dip your measuring cup into the flour until it’s mounded above the rim and level off the excess flour with the back of a knife. In my kitchen, a cup a flour weighs 4 1/2 ounces (130 grams).
The Difference Between Flours
Whole wheat flour(about 14% protein/gluten) Whole wheat flour is not the same as whole wheat pastry flour and should not be substituted for whole wheat pastry flour. Whole wheat flour is milled from hard winter wheat and is best used only for yeast breads. A loaf made entirely with whole wheat flour will be a dense and somewhat heavy loaf. For a softer loaf, it is often combined with some all-purpose or bread flour. Whole wheat flour is not suitable for other baking like cookies and cakes. *Since it contains the germ of the wheat which contains oil, once opened, this flour should be kept refrigerated in a tightly sealed container.
Whole wheat pastry flour(about 10% protein/gluten) Also called whole grain pastry flour, this flour is good for most recipes that use all-purpose flour when you want to add fiber. Whole wheat pastry flour is milled from a soft summer wheat and is best for baking cookies, brownies, pancakes, waffles, quick breads, and some cakes. Results will not be as light and soft as using all-purpose flour but you can also mix part whole wheat pastry flour and part all-purpose flour for soft baked goods with added fiber. (I use this flour the most in cookies, brownies, even pancakes & waffles for extra fiber) This flour is not a good substitute for whole wheat flour and is not suitable for baking yeast breads. Don’t have whole wheat pastry flour? Regular whole wheat flour is not a good substitute – your baked goods will be dense and heavy. Look for whole wheat pastry flour at health food stores or you can order it online. Once opened, it should be kept refrigerated in a tightly-sealed container.
Bread flour(about 14% protein/gluten) This flour is designed for yeast baking. It helps create more gluten for a better rise in yeast doughs. Use it for yeast bread and pizza dough for a chewy texture and good structure. However, all-purpose flour works almost as well with yeast. From my experience, if you don’t have bread flour, all-purpose flour can be used as a substitute in yeast bread and pizza dough.
All-purpose flour (about 10% protein/gluten) The name says it all. Use it for cookies, cakes, quick breads, yeast breads, pies, pancakes, etc.
Pastry flour(about 9% protein/gluten) This flour falls between all-purpose flour and cake flour and can be used in pastries, cookies and cakes. This flour is not suitable for baking yeast breads.
Cake flour(about 8% protein/gluten) This very fine grain flour is good in light and airy cakes like angel food cake. However, if a recipe does not call for cake flour and you decide to use it, you would use more (2 tablespoons more per each cup). Conversely, if a recipe calls for cake flour and you don’t have it, you can make your own: For one cup of cake flour, measure one cup of all-purpose flour, remove 2 tablespoons of flour and replace that with 2 tablespoons of cornstarch. I do not use cake flour – I don’t find it necessary. This flour is not suitable for baking yeast breads.
Self-rising flour(about 8 % protein/gluten) This soft flour is similar to pastry flour but has salt and baking powder added. Many southern recipes call for this flour in biscuits and pancakes but if the recipe calls for all-purpose flour and you substitute self-rising flour, you will need to adjust any added salt and baking powder. (one cup of self-rising flour contains 1 ½ teaspoons of baking powder and ¼ to ½ teaspoon of salt) This flour is not suitable for yeast breads.
I hope these simple flour basics are helpful. – Jenny Jones
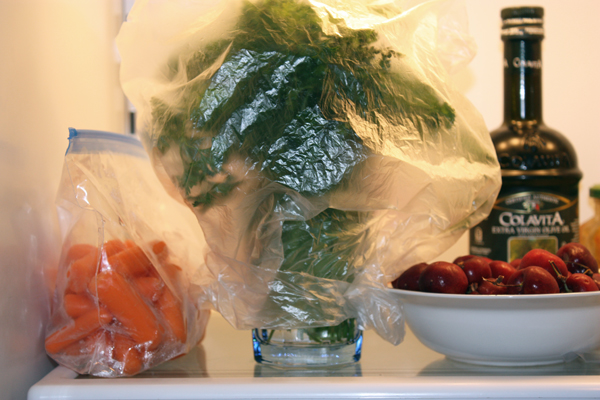
I’ve had this parsley for over a month! If you’re tired of throwing away wilted parsley, you will love this easy way to store fresh parsley. Just put it in a glass of water and cover it loosely with a plastic produce bag. I use the bag I brought it home in from the store. Fresh parsley is great to use in cooking but I only use a little at a time. I used to keep it in the vegetable drawer in a plastic bag but I always had to throw it away before I could use it all up. There had to be a better way. So I tried putting it in a glass of water in the fridge and it kept a little longer but after a few days it was drying out.
The solution to drying out had to be plastic so I tried putting a light weight plastic produce bag loosely over the parsley and glass and I could not believe how long it lasted. I put it away on November 23rd. That was five weeks ago! And look at it today…
I’ll be using this parsley until 2015! I’ll let you know when it finally runs its course – probably six or seven weeks. I just had to share!
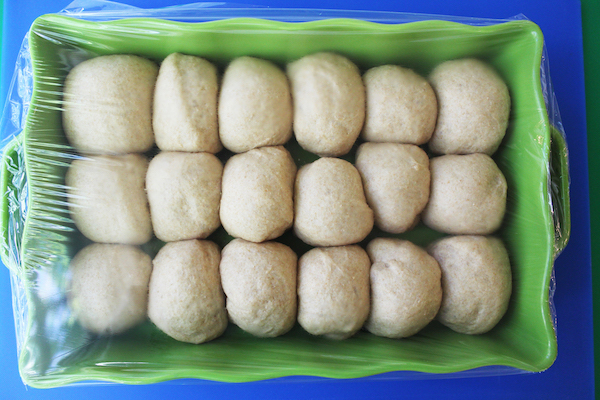
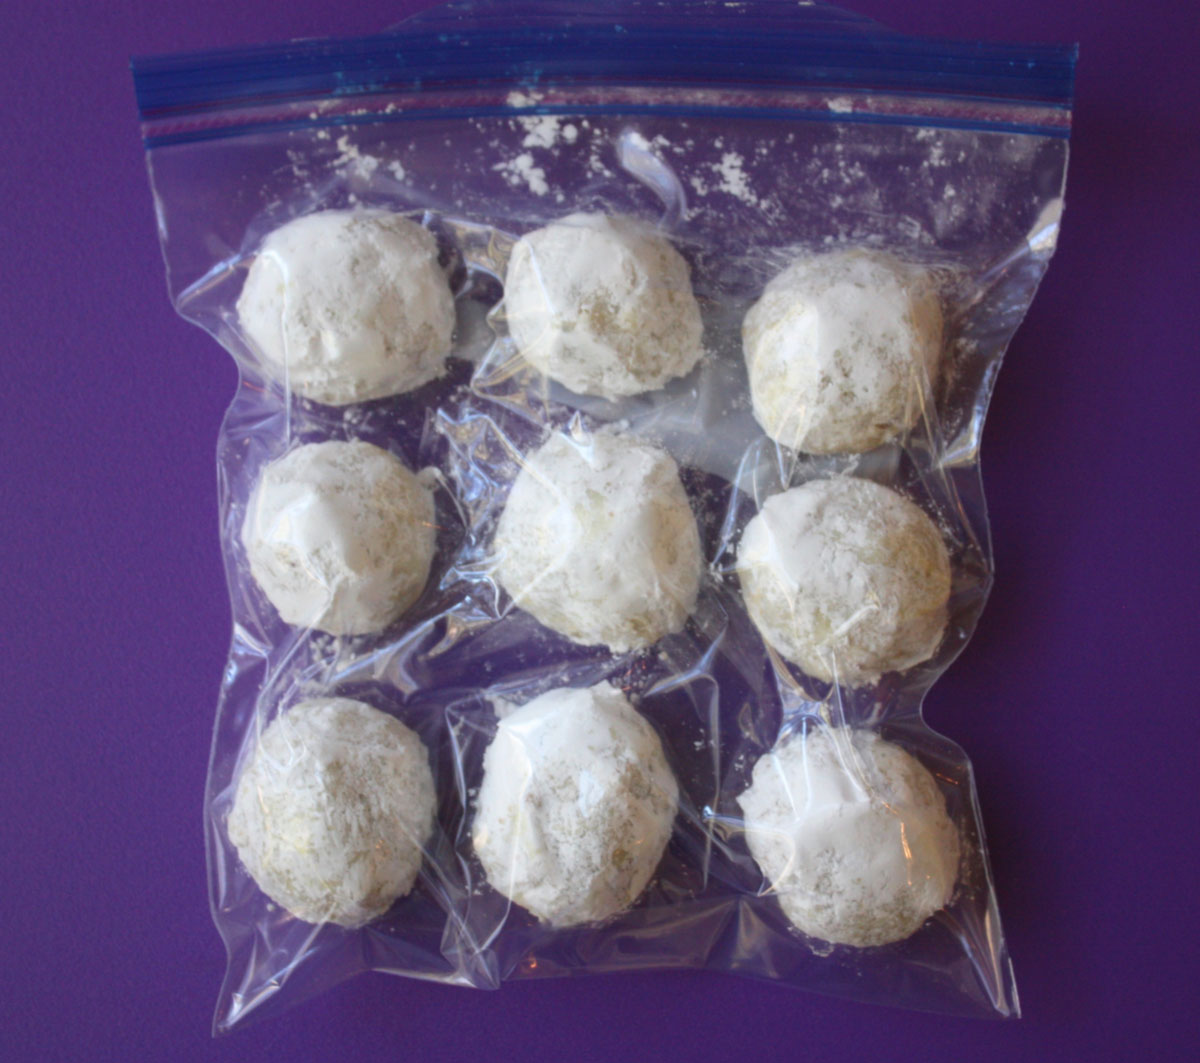
Guess what? There is no difference between frozen and freshly made pecan balls. I tested them myself and asked two other people to do a blind taste test and no one could tell the difference. This is good news because anything you can make ahead for the holidays is helpful. I’m sure there is more than one way to freeze these delicate Christmas snowball cookies but here is how I did mine:
Once they were completely cool and after the second roll in powdered sugar I gently placed them in a freezer bag so they were not touching.
I removed as much air as possible from the bag and placed them gently in the freezer.
To thaw I let them thaw overnight in the refrigerator and then brought them to room temperature.
Then I gently rolled them in powdered sugar again to freshen them up.
So there it is. This is how you can freeze your homemade pecan balls and have extra time for…. making more! To make these super easy Christmas cookies, click here for the recipe. – Jenny Jones