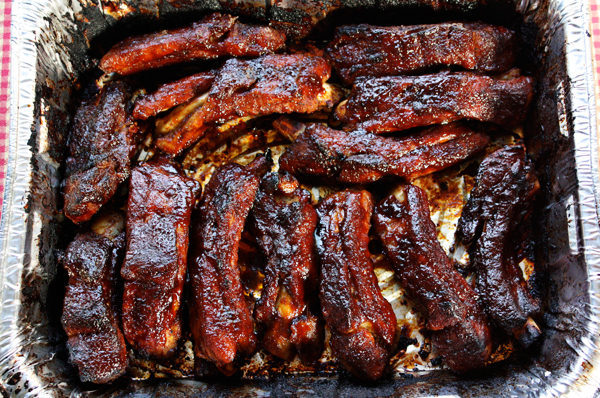
My fall-off-the-bone ribs are NOT spicy hot. This recipe has been really popular but having an international following has brought on some new challenges. I’m hearing, “I made your fall-off-the-bone ribs and they did fall off the bone but they were so spicy hot we couldn’t eat them.” It turns out that spices are not the same all over the world and the different labeling in some countries has caused my delicious ribs to be too hot to eat. But I don’t like spicy foods and my ribs are not supposed to be hot, so I am here to clarify the confusion for my international visitors.
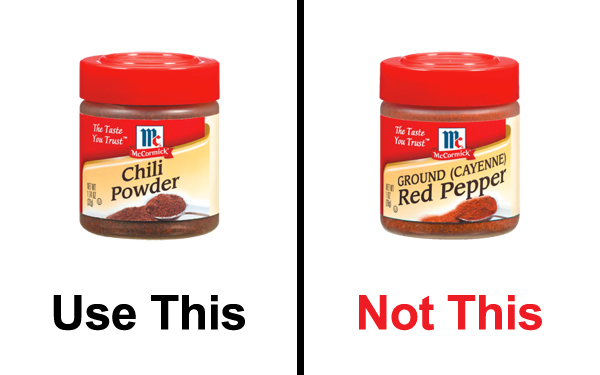
My rub and sauce recipes call for Chili Powder but I think some people are using Chili Pepper which is not the same thing. Not at all. Chili Powder is a mixture of spices and peppers and is a bit spicy but not anywhere near hot. That’s why I use 2 teaspoons in my rub and my sauce. But 2 teaspoons of Ground Chili Pepper, which is pure cayenne pepper, will bring tears to your eyes!
As if that’s not enough, the terms “chili” and “chile” are often used interchangeably but they don’t always mean the same thing. Chili powder is usually a blend of spices and it not considered hot, while Chile powder most often refers to pure ground spicy hot chiles. Since every country is different, the only way to tell is to READ THE INGREDIENT LABEL and DO NOT USE pure ground cayenne red chili pepper.
The recipes I post are all the things I make for myself and I do not like hot & spicy foods so I hope this helps everyone from Malaysia to Australia to Belgium enjoy these delicious fall-off-the-bone, NOT SPICY HOT ribs. And my thanks to Lee and Alissa who took time to let me know. Click here for the recipe. – Jenny Jones
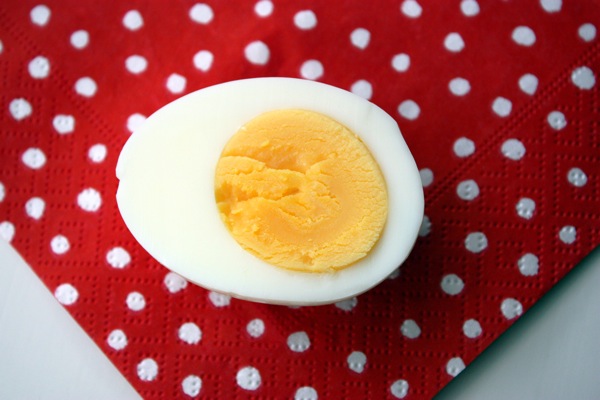
I make a lot of hard boiled eggs. A lot. There are some in my fridge right now… perfect, easy to peel, no green ring, hard boiled eggs for snacking, breakfast, deviled eggs, and egg salad. I’ve learned a few things about how to make foolproof hard boiled eggs so here’s what I know…
1) Really fresh eggs will be harder to peel so use your older eggs for boiling.
2) Place eggs in a pot and cover completely with cold water.
3) Do not crowd too many eggs in the pot or they may not cook.
4) If you see a stream of bubbles coming out of an egg in the cold water that means it’s cracked. Remove the cracked egg and save it for cooking.
5) Add ½ teaspoon of baking soda to the water. If you don’t have baking soda, use salt.
6) Bring the water to a full, rolling boil.
7) Cover the pot and turn off the heat, leaving the pot on the warm burner.
8) Set a timer for 17 minutes. Prepare a bowl of ice water.
10) After 17 minutes remove the eggs from the hot water using a slotted spoon and place them in the ice water for 2 minutes. They will still be warm inside after two minutes.
11) Serve immediately or keep refrigerated.
11) Freshly boiled, warm eggs will be easier to peel than cold ones.
12) Peeling them under running water makes peeling easier.
13) Start to peel at the fat end of the egg for easier peeling.
So that’s all I know about making perfect hard-boiled eggs. Now here is why I eat them: Eggs are a great source of….
~Protein, B vitamins, and minerals.
~Choline, which reduces inflammation, protects against breast cancer, and supports brain health.
~Lutein and Zeaxanthin to ward off macular degeneration.
~Sulphur for shiny hair, strong nails, and glowing skin.
~New research tells us that egg yolks contain dietary cholesterol but they do not raise blood cholesterol. For the latest research on eggs from Prevention Magazine, click here.
So that’s everything I know about making perfect, easy to peel, no green ring hard boiled eggs. Now here’s as quiz: Q: Why do brown eggs cost more than white ones? A: Because the hens are bigger and it costs more to feed them. Nutritionally, there is no difference.
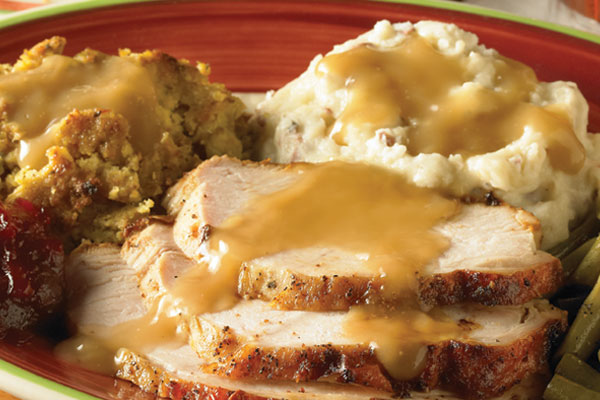
Who wants to make gravy at the last minute? Not me! I love to cook a traditional Thanksgiving turkey dinner with mashed potatoes but I’m starting my gravy today. It’s one less thing to deal with on Thursday. Here’s how I do it: I picked up a package of turkey wings this morning and roasted them in the oven. I just rubbed them with oil, salt & pepper and put them on a baking sheet, roasting for an hour at 375 degrees. Now I’m using them to make stock. I put the wings and every bit of their drippings into a big pot of water along with some onion, carrot, celery, parsnip, parsley, thyme, salt, pepper, and bay leaves. I will cook it down for 2-3 hours, let it cool, and refrigerate. (The meat from the wings makes a terrific sandwich).
Once the stock cools overnight, I skim off and discard the fat off the top and now I have a delicious roasted turkey stock, ready and waiting in the fridge, to use in my stuffing and to make gravy the day before. Any leftover stock… either becomes soup or I freeze it in ice cube trays for other cooking.
Use this with your own gravy recipe or try mine…
2 Tbsp. butter
1/4 cup flour
2 cups turkey stock
1. Melt the butter in a pan and add the flour. Cook and stir for 1-2 minutes.
2. Slowly whisk in the stock, stirring constantly until it’s smooth. Cook for 10-15 minutes.
3. Let it cool and refrigerate.
4. DAY OF: Just heat up your gravy and once your turkey is done, pour the drippings into a glass measuring cup and let them stand until they separate (I use a separating cup). Pour off and discard the fat and add the dark particles left on the bottom to your gravy. Taste for salt.
This makes a delicious, low fat gravy with no last minute stress. And for a lighter dessert, try my Lightened Pumpkin Cheesecake. Happy Thanksgiving!
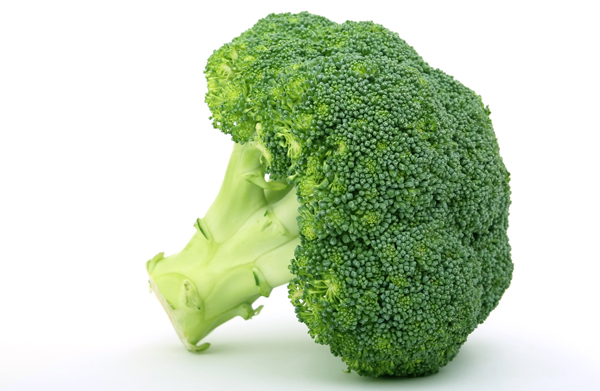
Luckily, green goes with my hazel eyes. We already know that eating broccoli is one of the healthiest things you can do, especially when it comes to protection against cancer, but how about wearing it? Researchers at the University of Arizona and Johns Hopkins University are testing to see if rubbing it on your skin may reduce the risk of skin cancer. The key ingredient is sulforaphane, which prevents the growth of cancer cells. The researchers will be testing a broccoli solution on skin to see if it works.
It could happen. But until it’s proven, don’t go to the beach with a bag of broccoli unless you plan to eat it. Continue using sunscreen and eating your broccoli. Imagine if they start selling broccoli sunscreen? What would they call it? Broc of Olay… La Roche-Brocay… Broccer-tone… Agreeno… Broc-o-gena… Broccoli Boat… Any other suggestions?
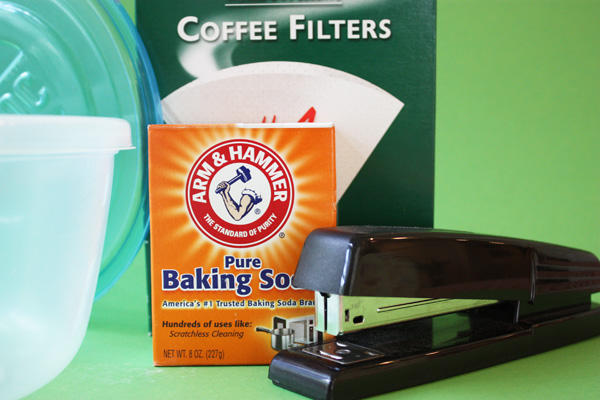
To keep crisp cookies crisp all you need is a stapler, a coffee filter, some baking soda, and an air-tight container. I can explain. The baking soda absorbs moisture and the coffee filter is made of a porous material full of tiny holes that lets the air circulate easily and allows the baking soda to absorb any moisture.
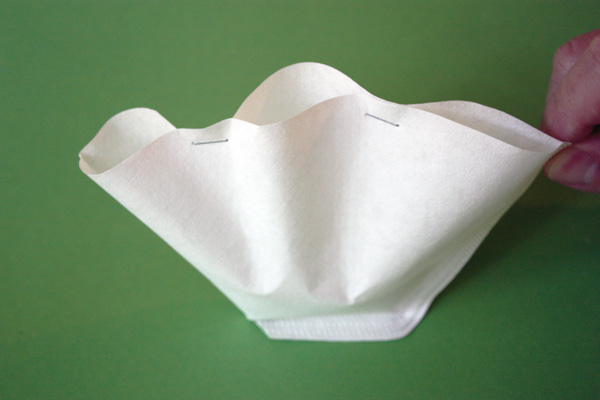
Put about 1/3 cup of fresh baking soda into a coffee filter and staple it closed with two staples, allowing the open edge to get as much air as possible. Stapling the baking soda inside the filter keeps it from spilling onto the cookies. A couple of staples is all you need. Also, make sure the freshly baked cookies are completely cooled before storing.
Place the stapled coffee filter in an air-tight container (in any position, upright or laying down) with your cookies and you will find them just as crispy the next day. Here are some other tips for keeping cookies crisp:
Cool cookies completely before storing.
Do not store soft cookies together with crispy cookies.
Glass containers are good for storing crispy cookies.
Do not store in plastic bags but use a covered container.
Refrigerating cookies will help keep them crisp.
If you freeze cookies they will be crispy if you eat them frozen.
Cookies that have softened will be never become crispy when stored no matter what tricks you use.
Cookies can be re-crisped in a 300 degree F oven for 5-10 minutes.
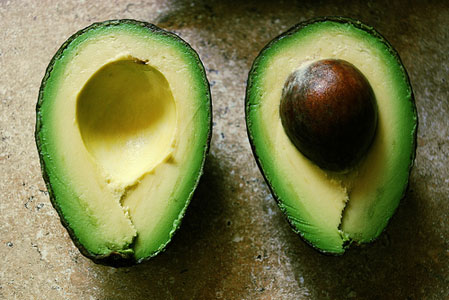
Did you know you can substitute avocado for some of the butter in cookies? Not all – but some – and it’s a good thing. This simple change eliminates some of the saturated fat in favor of the heart-healthy monounsaturated kind. You won’t taste the difference although your cookies might be a little green. But if they’re chocolate cookies, who’s gonna know? You can swap up to half of the butter in a cookie recipe with mashed avocado. This simple change will reduce the fat content and calories and you’ll still get the creaminess of butter and the fatty taste.
You would substitute an equal amount of mashed avocado for butter but since it doesn’t melt the same way, it won’t coat your dry ingredients the same. For that reason you need to increase your wet ingredients a little to compensate. To test it out, start slowly, like 2 tablespoons of avocado for 2 tablespoons of butter. Anytime I can reduce any of the butter in baking, I’m on it! – Jenny Jones
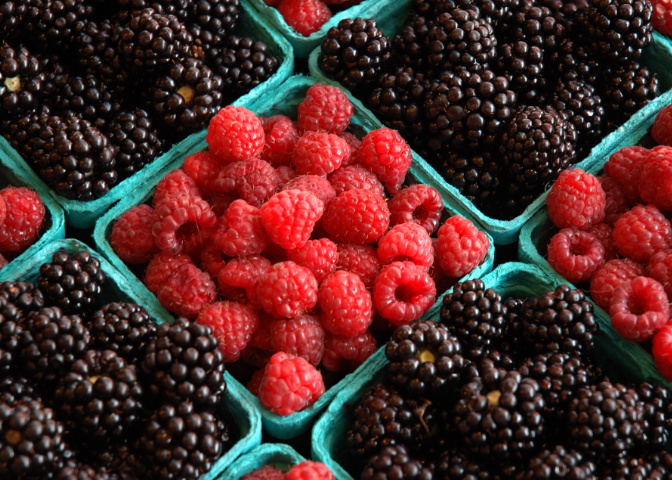
Berries are in season right now but they don’t always last very long. If you don’t eat them in that “window of freshness opportunity” they can spoil pretty fast. So here’s a way to make them stay fresher longer… wash them in vinegar and water. Make a mixture of 10 parts water to 1 part vinegar in a bowl (use white or cider vinegar). Let the berries soak for a few minutes and gently swish them around a little. The vinegar kills mold spores and other bacteria. Drain and rinse the berries and let them dry completely on paper towels. You can also spin them dry in a salad spinner lined with paper towels. Once they are dry, refrigerate and enjoy them… even longer. – Jenny Jones
Here’s an easy, healthy way to cool down in the summer without drinking sugary drinks. Just take a pitcher of fresh water and add some sliced fruit. After about an hour in the fridge, the fruit gives it a really nice, subtle and refreshing taste and it sure beats plain water. Plus it looks great, too. Today I added some sliced apple, lemon, watermelon, peach, mango, and apricot.
Fresh fruit is more affordable and better tasting in the summer so this is easy to do right now with any of your favorite fruits, or you could even add a refreshing vegetable like cucumber slices. Try it with my combination or create your own. I’m always trying to drink more water and this makes it easy because it tastes so good. It’s a healthy way to stay hydrated and now you can say, “Anyone for an aguas frescas?” – Jenny Jones
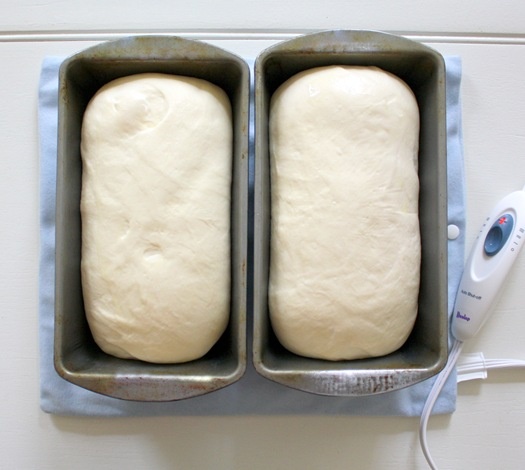
If you’ve ever baked bread or anything with yeast you know that it helps to have a warm spot to help the dough rise. Some things that work are a warming drawer, placing the dough under a lamp, or heating the oven for a minute and then turning it off (but then you need to preheat the oven). But here’s a way I never thought of… a heating pad. Whaddya think? Good idea? Or do you have something better?